Rustic Homemade Yeast Bread (Crispy Italian-Style Artisan Loaf)
This rustic homemade yeast bread delivers a shatteringly crispy crust and a soft, chewy crumb that rivals your favorite Italian bakery. Baked in a Dutch oven for that perfect artisan finish, it is easier than you think.

The Only Rustic Yeast Bread Recipe You Will Ever Need
There is something almost magical about pulling a loaf of homemade bread out of the oven. The crust shatters at the slightest touch, the inside is pillowy and soft, and the whole kitchen smells like the best Italian bakery you have ever walked into. This rustic homemade yeast bread is that loaf. It is a true artisan Italian bread recipe made with just six pantry staples and a technique that anyone can master, whether you are a first-time bread baker or someone who has been kneading dough for years.
This is the kind of crusty Italian bread recipe that earns a permanent spot in your rotation. It is the bread you bring to dinner parties, tear apart alongside a bowl of pasta, or simply toast with butter on a slow Sunday morning.
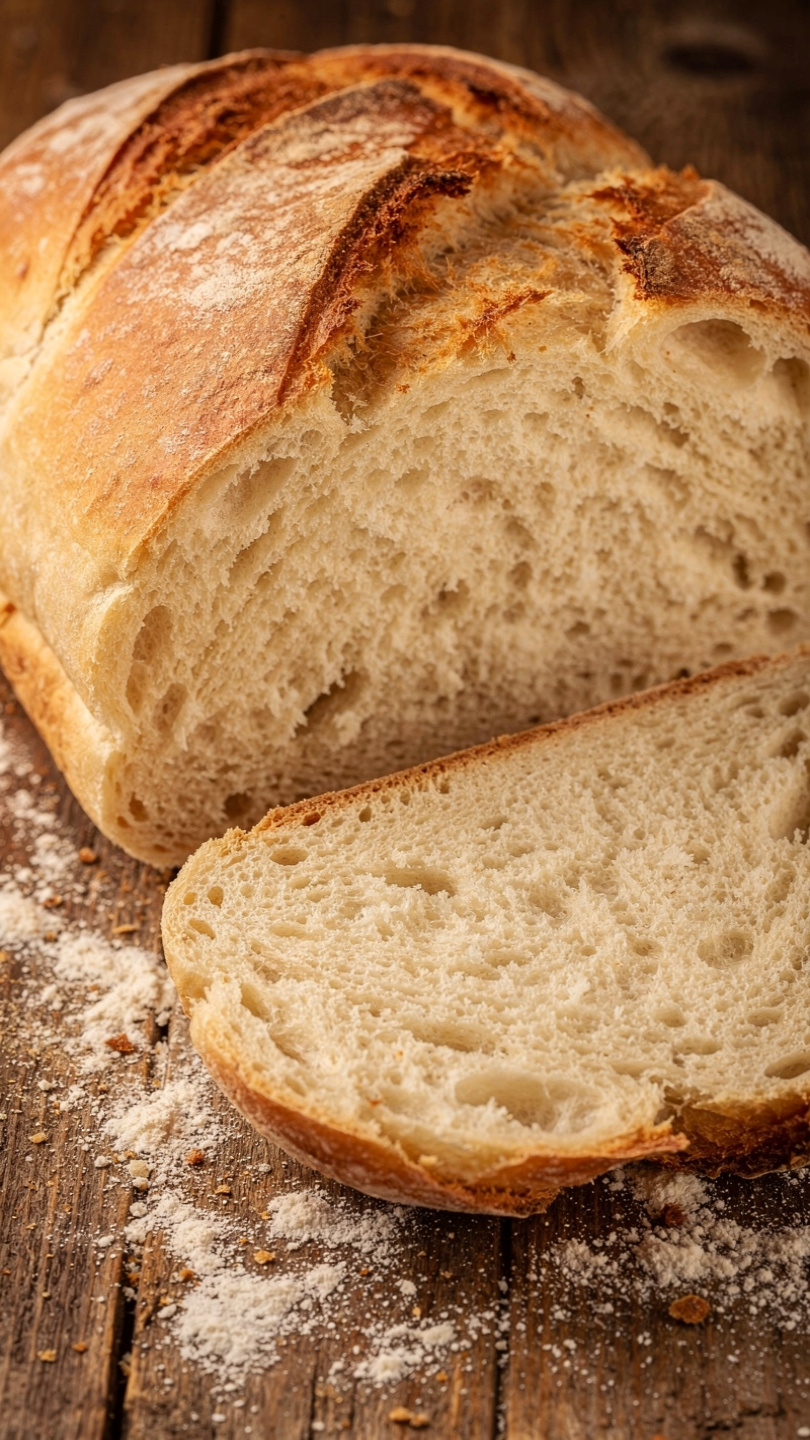
Why This Artisan Bread Works So Well
The secret to that iconic crispy crust comes down to two things: high heat and steam. Baking the dough inside a covered Dutch oven traps the moisture that escapes during the first minutes of baking, creating a self-steaming environment that professional bakers pay thousands of dollars to replicate in commercial ovens. The result is a loaf with a shatteringly crispy exterior and a soft, open, chewy crumb that is pure rustic Italian bread perfection.
This is not a quick bread. There is a rise involved, and it is absolutely worth every minute of it. The yeast does the heavy lifting while you go about your day.
Chef's Tip: Letting your shaped loaf rest for a full 30 minutes before baking (called a bench rest or second proof) allows the gluten to relax and gives the bread better oven spring. Do not skip it.
What You Need to Get Started
One of the beauties of this homemade bread Italian recipe is how minimal the ingredient list is. Flour, water, yeast, salt, a pinch of sugar, and a splash of olive oil. That is it. The quality of each ingredient matters more here than in a heavily spiced or sauced dish, so reach for a good bread flour and a fruity extra virgin olive oil if you have them.
Having the right tools makes this recipe noticeably easier and more rewarding to bake at home.
Shaping Your Rustic Italian Bread
You have two classic shape options here: a boule (a round ball) or a batard (an oval torpedo shape). Both bake beautifully in a Dutch oven. The batard tends to slice more neatly for sandwiches, while the boule is the more dramatic, Instagram-worthy centerpiece loaf.
To shape a boule, fold the edges of the dough inward toward the center, flip it seam-side down, and use both hands to rotate it on the counter in small circular motions, building surface tension across the top. For a batard, stretch the dough gently into a rectangle, fold the long edges in like a letter, then roll it away from you into a tight log.
Whatever shape you choose, remember to score the top with a sharp knife or bread lame just before it goes into the oven. That single slash is not just decorative. It controls where the bread expands and prevents the crust from cracking unpredictably.
Chef's Tip: Score swiftly and decisively at a slight angle rather than straight down. A confident cut about 0.5 inches deep gives the loaf the most dramatic, professional-looking ear.
Tips for a Perfectly Crispy Crust Every Time
- Preheat your Dutch oven for a full 30 minutes. A cold vessel will steam the bottom of the bread instead of crisping it.
- Do not under-bake. Pull the loaf when the internal temperature hits 200 to 205 degrees F. A pale loaf is a dense, gummy loaf.
- Cool completely before cutting. The crumb is still setting as it cools. Cutting into a hot loaf releases trapped steam and can turn the interior gummy.
- Use parchment paper. It makes transferring the dough into the ripping-hot Dutch oven safe and stress-free.
Ready to bake? Here is the complete step-by-step recipe:
Rustic Homemade Yeast Bread (Crispy Italian-Style Artisan Loaf)
This rustic homemade yeast bread delivers a shatteringly crispy crust and a soft, chewy crumb that rivals your favorite Italian bakery. Baked in a Dutch oven for that perfect artisan finish, it is easier than you think.
Ingredients
- 3 cups bread flour, plus extra for dusting; all-purpose flour also works
- 2 1/4 tsp active dry yeast, one standard packet
- 1 1/2 cups warm water, between 105 and 110 degrees F to activate yeast
- 1 1/2 tsp fine sea salt
- 1 tsp granulated sugar, feeds the yeast and encourages a golden crust
- 1 tbsp extra virgin olive oil, for the dough and lightly greasing the bowl
Instruction
In a small bowl, combine the warm water, sugar, and active dry yeast. Stir gently and let sit for 5 to 10 minutes until the mixture is foamy and fragrant. If it does not foam, your yeast may be expired or the water too hot.
In a large mixing bowl, whisk together the bread flour and sea salt. Make a well in the center and pour in the activated yeast mixture along with the olive oil.
Stir with a wooden spoon or dough scraper until a shaggy dough forms. Turn the dough out onto a lightly floured surface and knead by hand for 8 to 10 minutes until smooth, elastic, and slightly tacky but not sticky. Alternatively, use a stand mixer fitted with the dough hook on medium speed for 6 to 7 minutes.
Shape the dough into a ball and place it in a lightly oiled bowl, turning once to coat. Cover tightly with plastic wrap or a clean kitchen towel and let rise in a warm, draft-free spot for 1 to 1.5 hours, or until doubled in size.
While the dough rises, place a 4 to 6 quart Dutch oven with its lid inside your oven and preheat to 450 degrees F (230 degrees C) for at least 30 minutes. The preheated vessel is the secret to that bakery-quality crust.
Punch the dough down gently to release air bubbles. Turn it out onto a floured surface and shape it into a round boule or an oval batard. Place the shaped dough seam-side down on a large piece of parchment paper. Cover loosely and let it rest for 30 minutes.
Using the parchment paper as a sling, carefully lower the dough into the scorching hot Dutch oven. Use a sharp knife or bread lame to score a deep slash across the top of the loaf. Cover with the lid and bake for 25 minutes.
Remove the lid and continue baking for an additional 18 to 20 minutes until the crust is deep golden brown and the internal temperature reads 200 to 205 degrees F (93 to 96 degrees C) on an instant-read thermometer.
Carefully lift the bread out of the Dutch oven using the parchment paper and transfer it to a wire rack. Let it cool for at least 30 minutes before slicing. Cutting too early releases steam and can make the crumb gummy.
Equipment
- Large mixing bowl
- Small bowl
- Dutch oven (4 to 6 quart) with lid
- Stand mixer with dough hook (optional)
- Dough scraper or wooden spoon
- Parchment paper
- Instant-read thermometer
- Wire cooling rack
- Bread lame or sharp serrated knife
Notes
Serving Ideas and Variations
This crusty Italian bread recipe is endlessly versatile. Here is how to get the most out of every loaf:
Serving suggestions:
- Tear it apart and dip in good olive oil with a pinch of red pepper flakes and dried oregano
- Use it as the base for classic bruschetta with ripe tomatoes and fresh basil
- Serve thick slices alongside soups, stews, or a simple salad
- Toast slices and top with ricotta and honey for a stunning breakfast
Easy variations:
- Rosemary and sea salt: Fold 1 tablespoon of fresh rosemary into the dough before the first rise and finish with flaky salt
- Garlic bread loaf: Brush the baked crust with garlic butter straight out of the oven
- Olive and herb: Fold in 0.33 cup of chopped Kalamata olives and 1 teaspoon of dried thyme during shaping
This rustic Italian bread recipe homemade approach means the loaf is yours to experiment with. Once you have nailed the base recipe, the variations are almost endless. Happy baking.