Sourdough Bread Machine Recipe (Crispy Crust, Chewy Crumb)
Make tangy, bakery-worthy sourdough bread right in your bread machine with this foolproof recipe. Perfect for beginners learning how to start sourdough bread at home.

The Easiest Way to Start Making Sourdough Bread at Home
If you have ever wanted to know how to start sourdough bread but felt intimidated by all the folding techniques, Dutch ovens, and overnight timelines, this recipe is your entry point. Using a bread machine takes the guesswork out of kneading and the first rise, leaving you with a genuinely tangy, chewy, golden-crusted loaf that tastes like it came from an artisan bakery.
This is not a shortcut that sacrifices flavor. It is a smarter workflow. The bread machine handles the heavy lifting while your sourdough starter does what it has been doing for thousands of years, quietly fermenting and building complexity that commercial yeast simply cannot match.
What Do You Need to Start Sourdough?
Before diving into how to start making sourdough bread, it helps to understand the handful of things that actually matter. The non-negotiables are simple: an active sourdough starter, bread flour, salt, water, and a little patience.
What separates a good sourdough loaf from a forgettable one is the health of your starter. A bubbly, recently fed starter is everything. If yours has been sitting in the fridge unfed for weeks, give it two or three feedings over 24 hours before baking with it. Think of it like waking up a sleeping kitchen pet.
For this recipe, you will also need a bread machine with at least a Dough cycle. The machine kneads, rests, and handles the initial fermentation beautifully, even if it was not specifically designed for sourdough.
Having the right tools genuinely changes the outcome here. A reliable instant-read thermometer ensures your loaf is fully baked, and a sharp lame or scoring knife lets steam escape for that signature open crumb.
How Did Sourdough Bread Start? A Quick Bit of History
Sourdough is the original bread. Before commercial yeast existed, every loaf of bread on the planet was leavened naturally, using wild yeast and bacteria captured from flour and the surrounding air. The process was discovered almost by accident thousands of years ago, likely when someone left a flour-and-water mixture sitting out too long and noticed it bubbling to life.
What makes sourdough remarkable is that a well-maintained starter is essentially immortal. Some bakers use starters passed down through generations. The tangy flavor comes from lactic acid bacteria working alongside wild yeast, a natural fermentation process that also makes sourdough easier to digest than most commercial breads.
Knowing how sourdough bread started makes the whole process feel a little more magical, and a little less intimidating.
Bread Machine Sourdough: What to Expect
Here is the honest truth about how to bake sourdough bread daily using a bread machine: sourdough does not follow a strict clock. Unlike instant yeast, wild yeast moves at its own pace depending on starter activity, room temperature, and hydration. Your bread machine creates a consistent environment for the knead and first rise, but you should expect some variation in timing.
Chef's Tip: If your kitchen is cool (below 68 degrees F), the second rise can take up to 5 hours. Place the covered loaf pan on top of the oven while it preheats to create a warm proofing environment.
A few things to watch for:
- The dough should be tacky but not sticky. If it clings to the sides of the pan throughout the entire kneading cycle, add flour one tablespoon at a time.
- Do not skip the float test on your starter. An underactive starter is the number one reason sourdough loaves come out dense.
- Scoring is not optional. A proper slash lets the loaf expand upward rather than bursting unpredictably at the sides.
Getting Started With Sourdough: Tips for Beginners
If this is your first time exploring how to get started with sourdough, here are the most important things to internalize before your first bake.
Feed your starter consistently. Once a day at room temperature, or once a week in the fridge if you bake less often. A healthy, predictable starter is the foundation of every great loaf.
Use a kitchen scale whenever you can. Volume measurements for flour are notoriously inconsistent. Two people measuring a cup of bread flour can end up with amounts that differ by 20 grams or more. Weight removes that variable entirely.
Do not rush the second rise. This is where flavor develops. A properly proofed loaf will have a noticeably lighter texture than one that was rushed into the oven.
Reminder: If you are serious about how to bake sourdough bread daily, consider keeping a small dedicated journal or note on your phone. Jot down your starter's behavior, room temperature, and rise times. Patterns emerge quickly and help you dial in your process.
Ready to make it? Here is the full step-by-step recipe:
Sourdough Bread Machine Recipe (Crispy Crust, Chewy Crumb)
Make tangy, bakery-worthy sourdough bread right in your bread machine with this foolproof recipe. Perfect for beginners learning how to start sourdough bread at home.
Ingredients
- 1 cup active sourdough starter, fed and bubbly, at peak activity
- 3/4 cup warm water, around 90 degrees F
- 3 cups bread flour, plus extra for dusting
- 1 1/2 tsp fine sea salt, do not substitute with table salt
- 1 tbsp olive oil, extra virgin, for a slightly softer crumb
- 1 tsp honey, optional, helps activate fermentation and adds a hint of sweetness
Instruction
Feed your sourdough starter 4 to 8 hours before baking. It should be bubbly, doubled in size, and pass the float test before you use it.
Add ingredients to your bread machine pan in the order recommended by your manufacturer. Typically: warm water first, then olive oil and honey, followed by the sourdough starter, then bread flour, and finally salt added to a corner away from the liquid.
Select the Dough cycle on your bread machine. Let the machine knead and complete the first rise, which typically takes 1.5 to 2 hours depending on your machine.
Once the dough cycle finishes, check the dough. It should be smooth, slightly tacky, and have risen noticeably. If your machine has a sourdough or whole wheat cycle, use that instead for a longer, gentler knead.
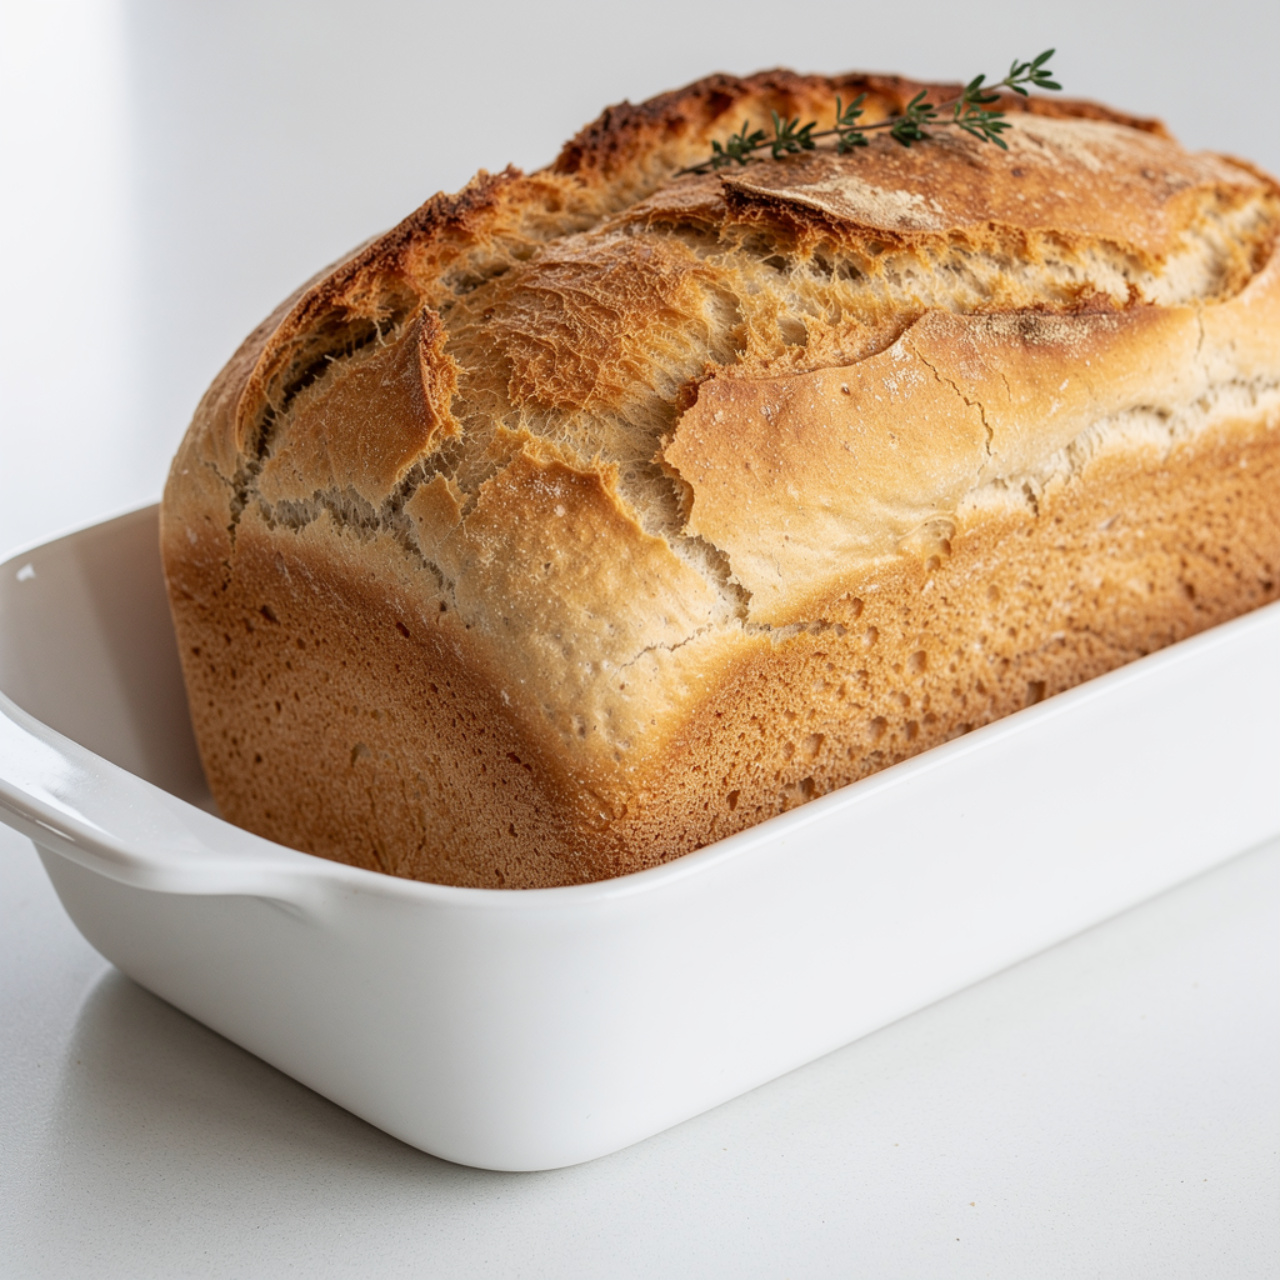
If you want the bread machine to bake the loaf fully, switch to the Basic or White Bread cycle after the dough cycle completes, skipping the second knead. Otherwise, remove the dough from the pan, shape it into a round or oval loaf, and place it in a lightly greased loaf pan.
Cover the shaped loaf with a clean kitchen towel or plastic wrap and allow it to rise at room temperature for 2 to 4 hours, or until it has risen about 1 inch above the rim of the pan. The timing will vary based on how active your starter is and how warm your kitchen is.
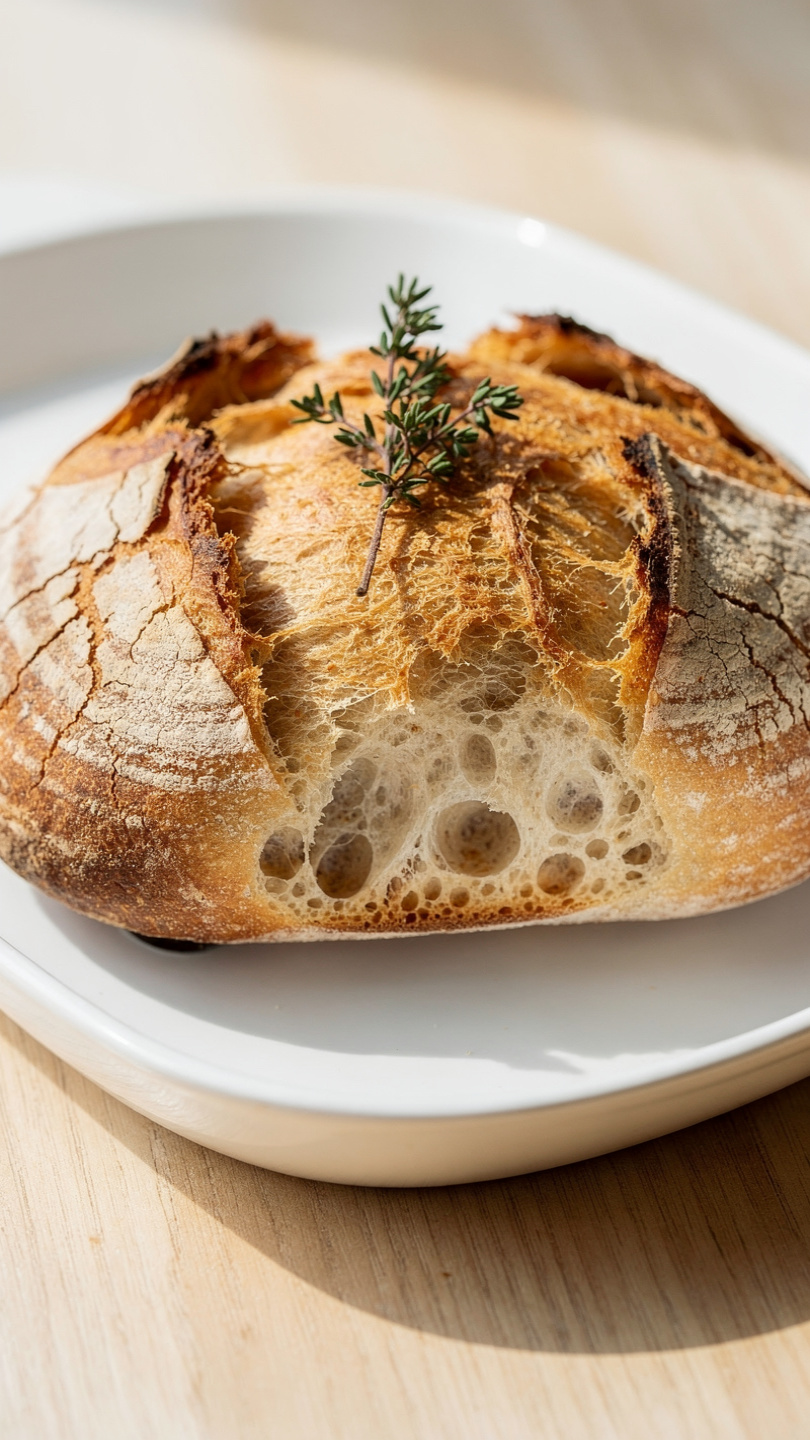
Preheat your oven to 450 degrees F (230 degrees C). Score the top of the loaf with a sharp lame or serrated knife, making a single slash down the center.
Bake for 30 to 35 minutes, until the crust is deep golden brown and the internal temperature reads 200 to 210 degrees F (93 to 99 degrees C) on an instant-read thermometer.
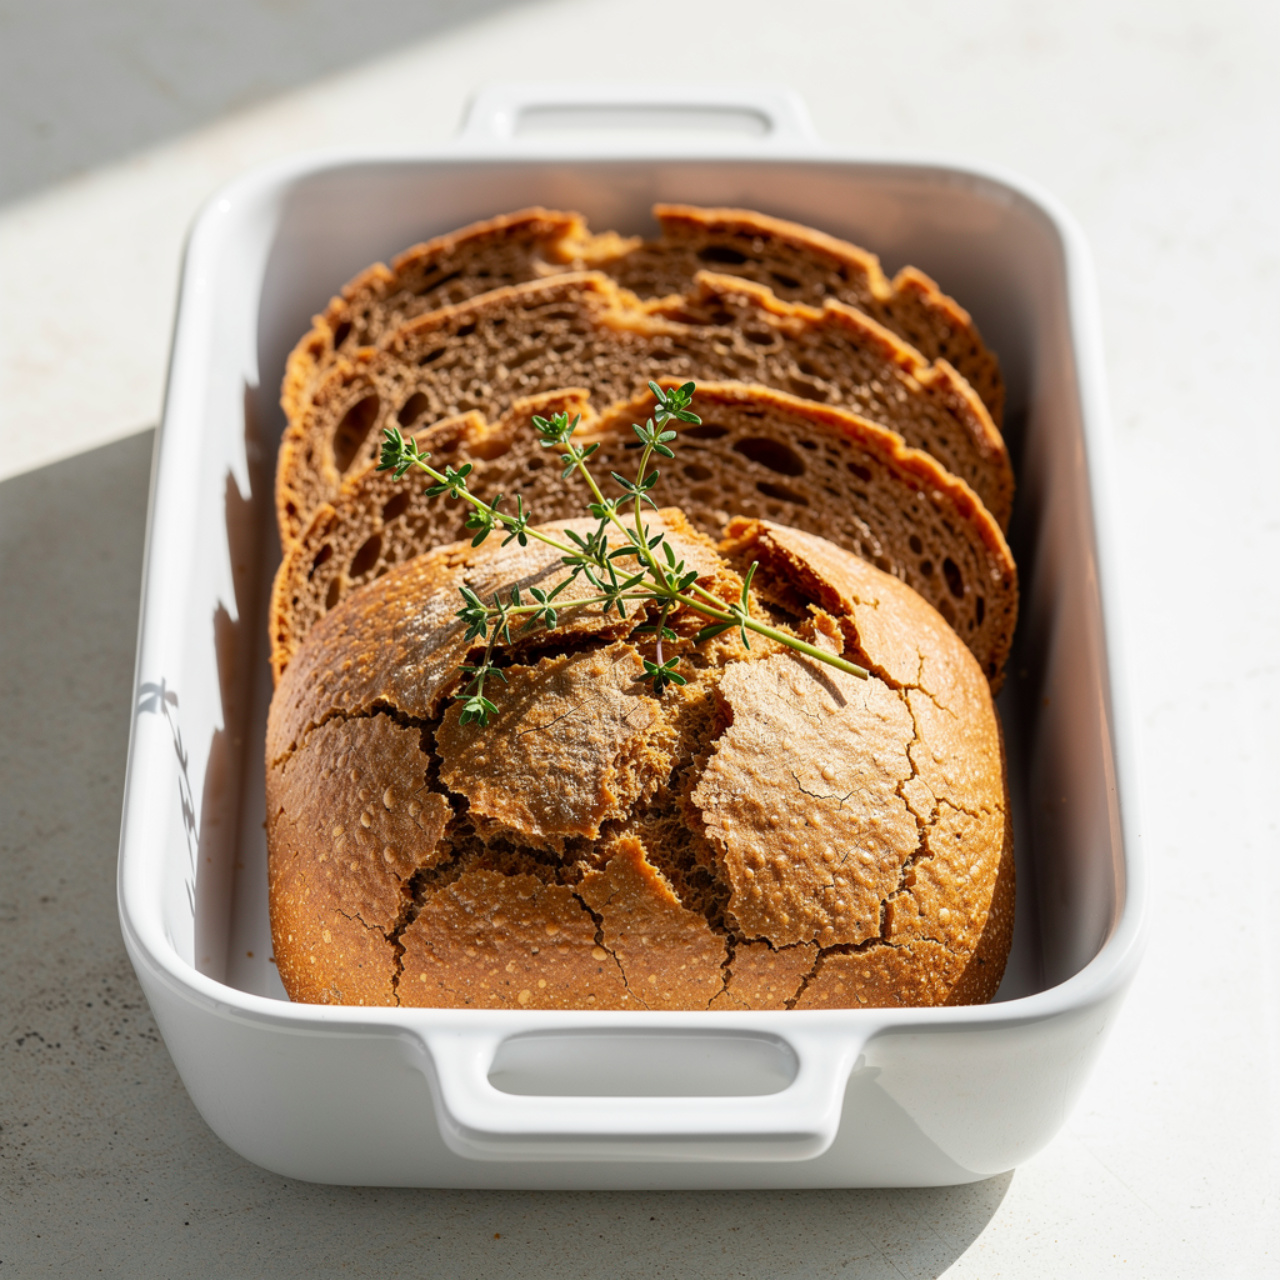
Remove the loaf from the pan and let it cool on a wire rack for at least 1 hour before slicing. Cutting too early will result in a gummy crumb.
Equipment
- Bread machine with a dough cycle
- Large mixing bowl
- 9x5 inch loaf pan
- Bench scraper
- Lame or serrated knife for scoring
- Instant-read thermometer
- Wire cooling rack
- Kitchen towel or plastic wrap
Notes
Serving, Storing, and Variations
Fresh sourdough is one of life's genuinely simple pleasures. Serve it warm with good salted butter, alongside a bowl of tomato soup, or sliced thick for an open-faced avocado toast that is leagues above anything made with store-bought sandwich bread.
For storage, wrap the completely cooled loaf in a linen towel rather than plastic. Plastic softens the crust within hours, turning your beautiful artisan loaf into something disappointingly soft. A linen cloth breathes just enough to keep the crumb moist while preserving that crackly exterior.
Once you have mastered the base recipe, try these variations:
- Rosemary and sea salt: Add 1 tablespoon of fresh chopped rosemary and a sprinkle of flaky salt on top before baking.
- Seeded crust: Brush the scored loaf with water and press sesame, poppy, or sunflower seeds into the surface.
- Whole wheat blend: Swap up to half the bread flour with whole wheat flour for a nuttier, more complex loaf. Add an extra tablespoon of water to compensate.
However you serve it, this bread is proof that learning how to start making sourdough does not have to be complicated. With a healthy starter, a bread machine, and a little patience, a genuinely exceptional homemade loaf is completely within reach.